.svg)


Proxmox is a useful set of virtualization tools that enable, e.g., creating and restoring backups, monitoring resources like CPU and RAM usage, storage capacity and throughput, ingoing and outgoing network traffic. In this article, you can discover how to install it on a dedicated server from OVH.
What is Proxmox?
According to its website, Proxmox Virtual Environment is a complete open-source platform for all-inclusive enterprise virtualization that tightly integrates KVM hypervisor, LXC containers, software-defined storage and networking functionality on a single platform. It allows to easily manage high availability clusters and disaster recovery tools with the built-in web interface.
Why are we using it?
Our use case is running a couple of legacy LXC containers with relatively large storage. Migrating them to a cloud solution would not bring any significant advantages or cost reductions, and the process would not be trivial. Apart from that, Proxmox is a very powerful and easy to use set of tools. Creating and restoring backups is a one-click action. Monitoring resources like CPU and RAM usage, storage capacity and throughput, ingoing and outgoing network traffic, is set up out-of-the-box. Furthermore, it can be effortlessly extended with an alerting system.
Disclaimer: As we didn’t need high availability in our project, we used only one server and didn’t set up any extra HA features that Proxmox offers.
What was easy?
Buying a dedicated server from OVH is quick and easy. Go to the OVH website, pick the configuration that suits your needs, your favourite Linux distribution, pay, and by the next day you should be a proud owner of a fresh server. Don’t forget about ordering extra IP addresses if you are planning to run VMs or VM-like containers.
A non-technical thing worth mentioning is that we recommend adding company credit card as a payment method for bought services. This will prevent OVH from shutting down your machines when the accounting department forgets to pay the invoice before the billing period ends.
One you can access the machine, set up your sshd service - we recommend disabling password login and installing fail2ban. It will help with keeping your server secure, by blocking IP addresses that attempt brute-force attacks against your sshd service. Next, create a very strong password for the root user - it will be required later, to login to the Proxmox web panel.
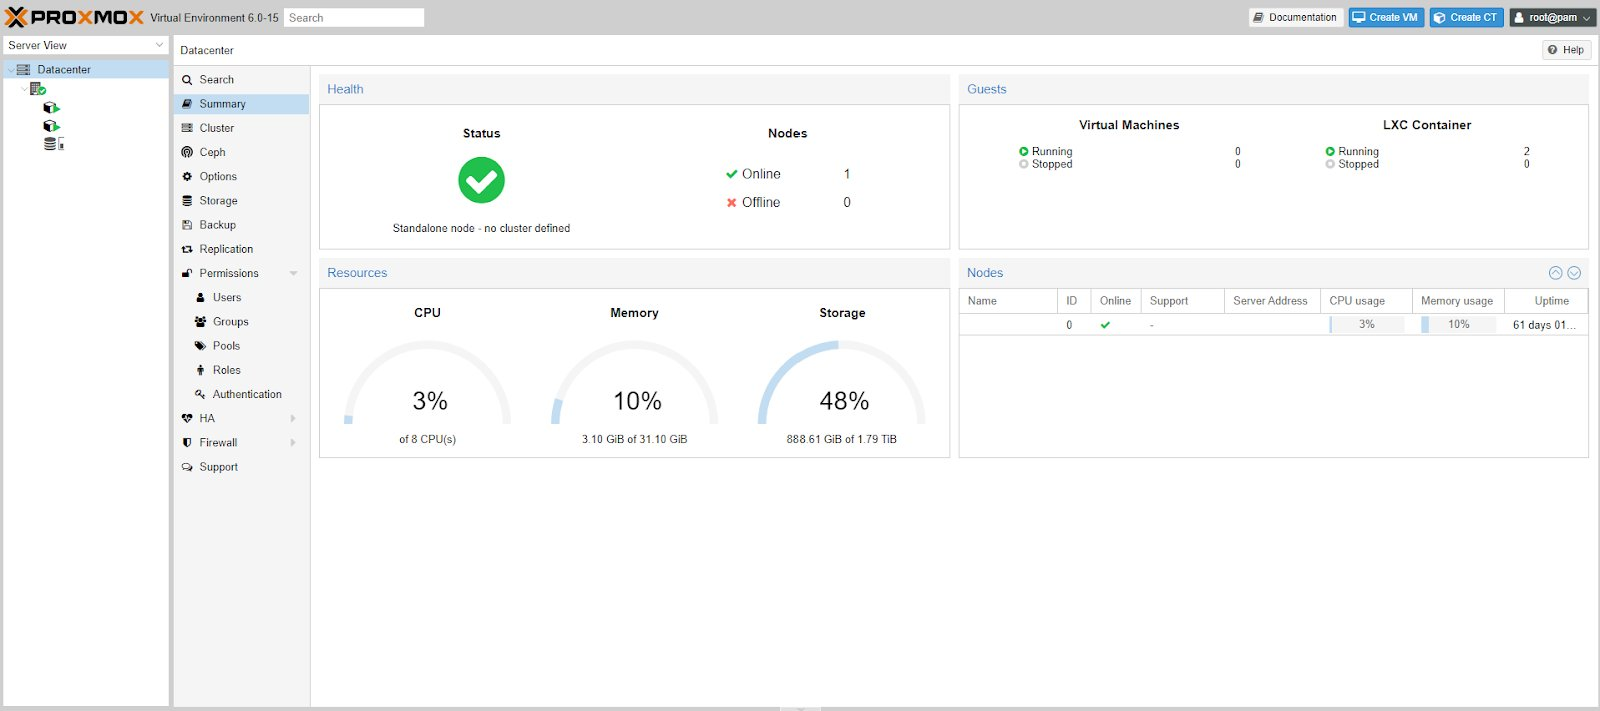
Now comes the time to install Proxmox VE itself. If you have chosen Debian as your OS, you can use the official instructions or unofficial, but more detailed guide. Once you finish the installation and it is possible to login to the web panel (https://your-server-ip:8006/), everything should work fine, apart from networking, which brings us to the next chapter.
What wasn’t easy?
Although most instructions for Proxmox installation are clear, the parts about setting up the networking are often too simple to make sense or too complex to comprehend. We won’t go into much detail and only explain what worked for our setup on OVH.
Edit the /etc/network/interfaces file:
auto lo
iface lo inet loopback
source /etc/network/interfaces.d/*
auto eno1
# real IP address
iface eno1 inet manual
iface eno1 inet static
address your-server-ip
netmask 255.255.255.0
gateway your-server-ip-but-wtih-254-ending
auto vmbr0
# Bridge
iface vmbr0 inet static
address your-server-ip
netmask 255.255.255.255
bridge_ports eno1
bridge_stp off
bridge_fd 0
post-up route add your-server-ip-but-with-254-ending dev vmbr0
post-up route add default gw your-server-ip-but-with-254-ending
our-server-ip is the one displayed as public in the “Network interfaces” tab of your OVH dedicated server dashboard, e.g. 12.34.56.78. For this example, the your-server-ip-but-with-254-ending is 12.34.56.254 - that’s how OVH creates gateway addresses for its IPs.
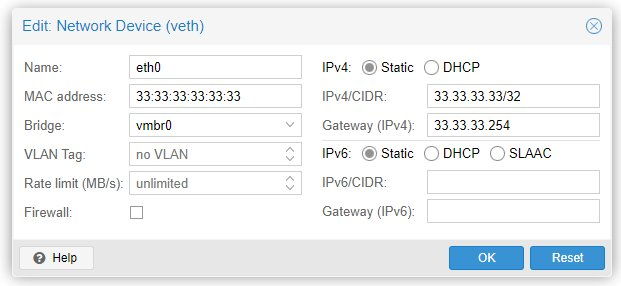
Once you apply this configuration (`sudo systemctl restart networking.service`), you should be able to set up virtual machines and containers with their public IP addresses. To get an IP address that can be used, you need to buy a failover IP for your server and attach a virtual MAC address (guide). Then, when setting up networking for a VM/container via the Proxmox panel, enter your MAC, IP, and gateway addresses. Example for 33.33.33.33 IP with 33:33:33:33:33:33 MAC:
How does it work?
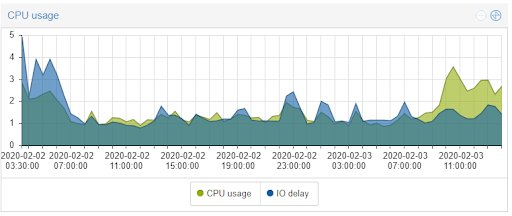
It’s been about 2 months since we started using Proxmox, and we haven’t had any problems with it. Containers are running without any issues, and their performance is good and stable.
That’s everything that made our Proxmox setup work. If something is still not clear or you need assistance with setting up your stack, feel free to contact us.


